


Workshop
From Start to finish it takes around 12 weeks to make a Karl Craik cue. This is just the hands on time once you place an order. The shaft wood has in fact been seasoning in my workshop for many months before that. Sometimes it will take longer if necessary as quality will not be compromised. Below is a brief explanation of the major steps taken in building a 1st class cue.

Countless hours are spent in timber yards around the county scouring their racks for that 5% of wood that’s good enough to make it into a KCC. Trying to find Ash that is straight grained, tight grained, clean in colour and has no knots, sap marks or checks in it takes patience and time. Most yards are pretty accommodating these days and let me take an electric plane to their stock. I do this as most places only stock boards in rough sawn states only. It’s very hard to pick out ‘good grain’ when they are rough sawn so being able to put a smooth flat edge on a board lets me see its potential in much finer detail.


The boards are first taken to the table saw where with the use of custom built jigs they are squared up on all 4 edges. This is an important first step as its these faces which will be used as a datum to cut the blanks in the next step.
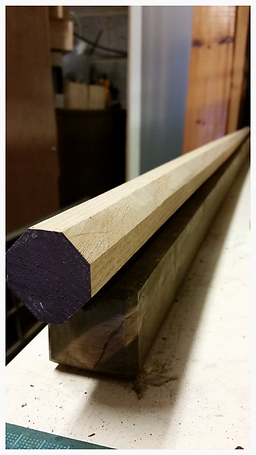
The square blanks are then marked out and turned into tapered OCTAGONS ensuring that they remain straight even at this early stage. The octagon edges are then planed over and over again until a round cue starts to take shape. The Cue is still very much oversize at this stage. It is then set aside for a number of weeks to allow any remaining internal stresses in the wood to relieve.


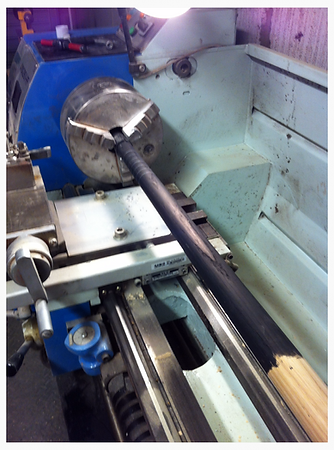
Once a shaft has been deemed worthy, it is dyed black and using the lathe, splice sizes are marked out with a contrasting white pencil. The lathe ensures the the marks are perfect all around the cue.
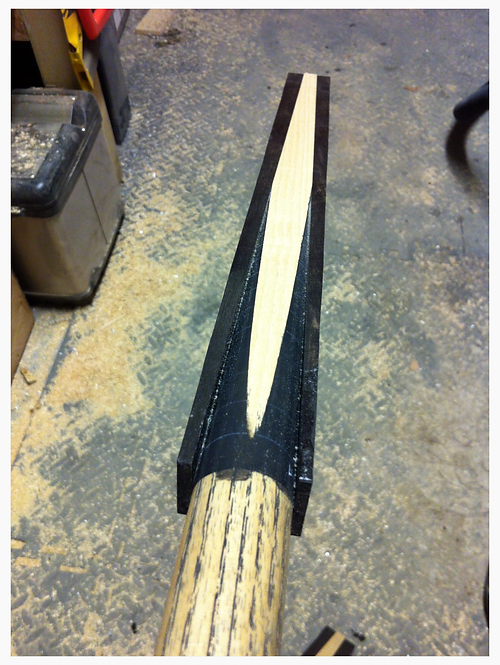
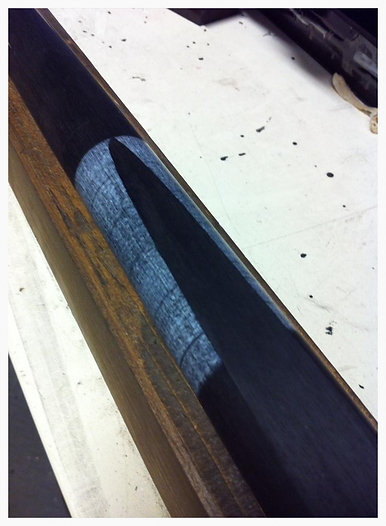
Each splice is planed into the shaft at the desired angle to create the long tips and classic look. The main butt wood (typically EBONY or ROSEWOOD) is then glued onto each face and held in place to cure using G-Clamps. The process is then repeated on the other side of the cue. This creates the 4 splice arrangement.
The major butt splices are then blanded into the shafts and checked for uniformity.


When a joint is required by the customer it is installed on the lathe. This ensure an accuracy of less than 0.005mm error. First the shaft is centre drilled then opened up incrimentally through bigger and bigger drill sizes. Going though several drill sizes means that each pass is only removing the bare minimum of material required and thus not stressing the wood. The final hole size is then cut using a boring bar mounted in the tool post. This is how a hole can be uniformly accurate to 0.005mm and so when the brass joint is glued in you can be certain that it is dead centre.

The butt section of the cue is then marked and cut in the same way as its own splices were.
The decorative wood is prepared, cut and sanded smooth ready for gluing to the butt. Typically this works best when there is a high contrast in colour between it and the butt wood. Olivewood (seen here) is a particularlly popular choice.
A selection of 3/4 butts with their first splices glued on. The process is then repeated for the 3rd and 4th splices.
Decorative Splices


Ferrule:
Using the accuracy of the lathe again ensures that the interface between wood and metal is absolutly perfect. The tennon for the ferrule is cut so that the brass is a press fit ensuring that the brass is well seated on the shaft. A poorly fitted ferrule is likely to come off in no time. Glue relief slots are also cut into the tennon to provide additional security. A strong epoxy resin then permanently fixes the components together.
Butt Joint;
As standard all Karl Craik cues are fitted with a butt joint that caps off the end of the cue. This not only allows the use of extensions but provides a lot more protection for the wood in the cue. Cues get dragged along the floor during play and over time you will see where the wood has been worn down because of this. The brass cap is esential to preventing this but you dont see it in many inferior cues.


Badge;
Only when the cue fully meets expectations does it get its badge. They are available in a range of colours and can even be personalised with your name. They are not a cheap print. Instead they are all laser engraved for a permanent quality apperance.
Finishing

Finishing - The last but one of the most important steps in delivering a high quality product of any kind is the surface finishing. In cues this is doubly important as the finish has to look right but also feel right. Great care is taken in the final finishing of a cue. I’ve already mentioned the finishing elsewhere on this site but I feel it worth repeating. My cues take around 10 days to finish. This lets each layer of product cure properly. You really can’t rush this. The result is a natural feel in the hand but with a durable high gloss finish that looks beautiful.
Sealing the shaft - Ash doesn’t have black grain. That’s something we cue makers add ourselves. Ash also has very open grain so this needs to be filled when it’s intended for use in a cue. If we left the ash grain unfilled the cue would not feel smooth over your bridging hand. To blacken and seal the grain I use my own concoction of readily available products. I have experimented endlessly with different types of products from every supplier I could find until I found the right combination that suits me and can actually be mixed together without the chemistry of the products having an adverse effect on each other. Some things just don’t mix. This potion is applied to the shaft and left to cure overnight. Once dry it can then be sanded off to reveal the grain of the shaft. Depending on how open or coarse the grain is several coats are applied (usually 2-3). This continues until the shaft is as smooth as you can get it.
Each of my cues will receive the following;
-
Sanding from 150 to 1200 grit,
-
Blackened grain filler (Ash shafts only),
-
Clear sealer,
-
My own blend of oils,
-
My own wax compound,
-
Buffing and polishing to 18,000 grit.
And thats how its done...
